Destination Terminal
The Destination Terminal is an alternative way to set a time travel location. You can place a sign inside the TARDIS and use the /tardis update terminal command to add a Destination Terminal, or use the button in the TARDIS Control Menu.
To use the Destination Terminal, right-click it to open an inventory based GUI or Minecraft dialog (see below). You will see a screen like the one
below. The basic functions of the GUI are the same as when using the repeaters on the TARDIS console — you can set
the x and z coordinates, a distance multiplier, and a world type. The Destination Terminal also lets you select the
TARDIS submarine mode for travelling under water.
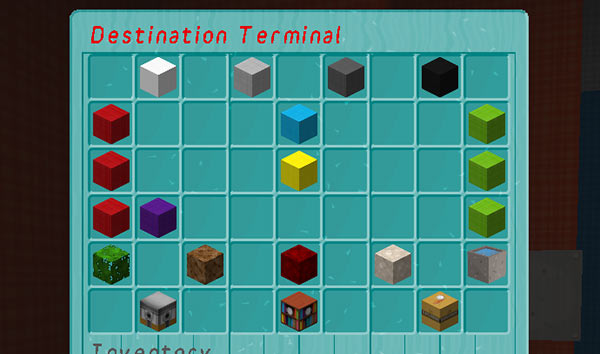
Key to the blocks
First row: Step levels — these control how much the x, z and multiplier values change.
- Step 10
- Step 25
- Step 50
- Step 100
Second row: x coordinate.
- Make x move towards negative
- x coordinate value
- Make x move towards positive
Third row: z coordinate.
- Make z move towards negative
- z coordinate value
- Make z move towards positive
Fourth row: distance multiplier.
- Make multiplier less
- Multiplier value
- Make multiplier bigger
Fifth row: world/environment type.
- Use current world
- Random overworld
- A Nether world
- An End world
- Submarine mode
Bottom row: check/set destination.
- Check destination
- Set destination
- Cancel
Dialog interface
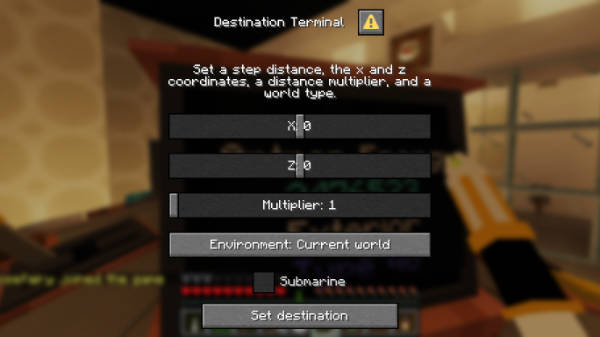
You can set your TARDIS player preference to open a Minecraft dialog instead of an inventory GUI. Use the sonic preferences GUI, or the command /tardisprefs dialogs [on|off].
The dialog functions much like the GUI detailed above.
- Use the sliders to set the distance multiplier, x coordinate and z coordinate
- Set a world environment type with the Environment button
- Set the Submarine mode
- Click the Set Destination button to find a a location with the current settings
Video
Slightly outdated, but you’ll get the idea...