This page is very outdated, TARDIS textures now use vanilla item model defintions, and Optifine/MCPatcher is no longer required.
You should use the new TARDIS-Resource-Pack found here:
Optifine/MCPatcher texture support
From version 2.9-beta-1, TARDIS now supports custom block and item textures for all TARDIS items by utilising the Connected Textures Mod (CTM) and Custom Item Textures (CIT) that are part of MCPatcher.
To see the custom textures, you MUST install MCPatcher and the TARDIS-MCP resource pack!
How it works
CTM has a feature where you can set different textures for blocks depending on which biome they are found. To make the TARDIS Police Box use custom textures the 3 x 3 block area where the TARDIS lands is set to a DEEP_OCEAN biome. When the TARDIS leaves the location, the biome is reset back to what is was originally.
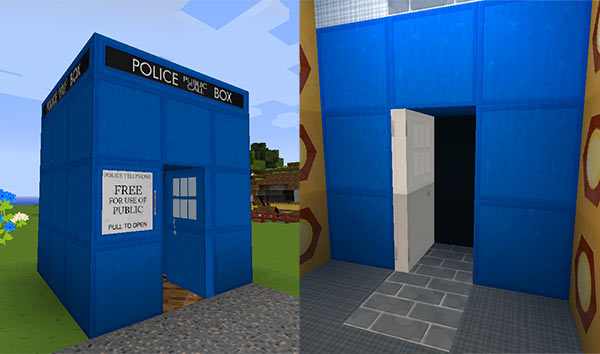
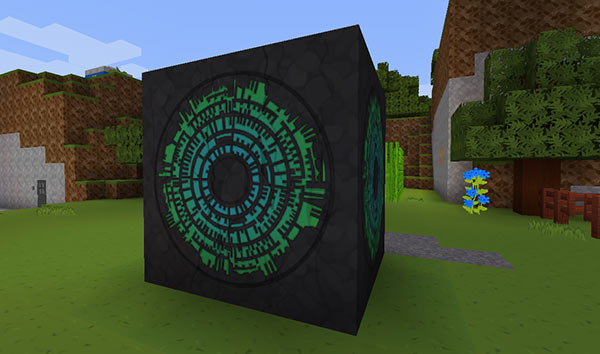
Currently, only the Police Box and Pandorica use custom block textures.
For interior textures, the TARDIS console and rooms are set to the VOID biome. There are custom wall, advanced console, disk storage container and door textures.
If you would prefer that TARDIS does not change the biome in your worlds, you can turn off the feature in the config —
use the admin command to toggle the settings — for Police Boxes use: /tardisconfig set_biome [true|false], and for
TARDIS worlds use: /tardisconfig sky_biome [true|false].
CIT allows TARDIS to have custom item textures by detecting the display name and/or lore of the item. For example, this lets sonic screwdrivers have a custom texture without changing all BLAZE_RODs to a sonic texture.
Notes
An ‘umbrella’ is added to the police box when set_biome is true and the TARDIS lands in a dry biome. The umbrella is
a 3 x 3 x 1 area of glass blocks set at y=255.
Only new interiors and rooms are set to VOID biome, to change existing consoles and rooms, you will need to use the
WorldEdit //setbiome void command
The interior TARDIS door may need its hinge location changed, use the /tardis update hinge command while targeting the
top-half of the door.
For existing Police Boxes, things may look a little odd until you rebuild the TARDIS or travel...
A new /tardisprefs ctm [on|off] command can be used in conjunction with the custom textures — if on the plugin
replaces the left front wool block in the Police box with a quartz pillar textured on ends with the TARDIS door sign.
You may prefer to set this off so that players without MCPatcher installed will see the regular blue wool block.
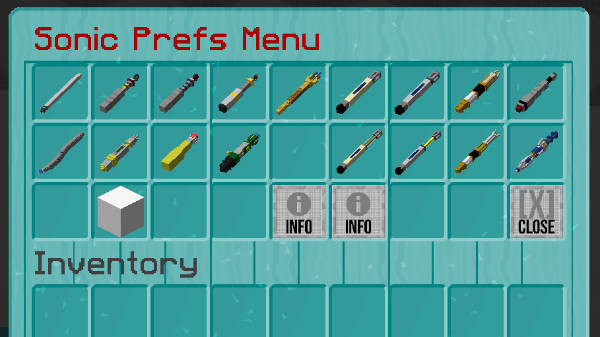
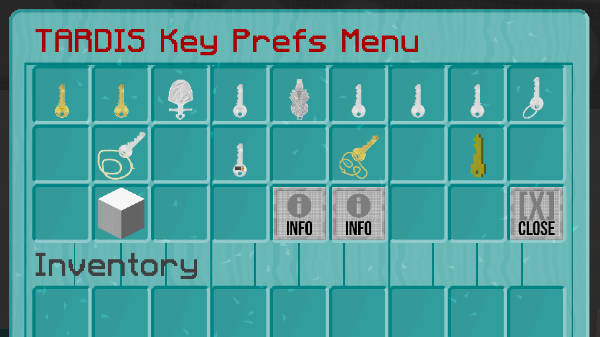
Sonic screwdriver and TARDIS keys
CIT also lets us have multiple textures for some TARDIS items. Want your sonic screwdriver to look like the eighth Doctor’s one? Want your TARDIS key to be like the first Doctor’s brass Yale key? No problem... TARDIS now has a Sonic Prefs Menu and a TARDIS Key Prefs Menu.
To access the menus:
- Sonic menu —
/tardisprefs sonic - Key menu —
/tardisprefs key_menu
To change the texture for the item, put it in the bottom-left-most slot and then click the texture of your choice.
Keeping the resource packs up-to-date
The TARDIS resource packs are shared in GitHub repositories. If you install a GitHub client, you can easily keep your resource packs current by syncing with any changes that are pushed to the repository.
Here’s a quick run down on doing that:
-
Download and install the GitHub client for your operating system:
-
Start GitHub client and create a free GitHub account (if you don’t have one)
-
In your web browser, naviagte to the TARDIS resource pack repositories
-
Click the Clone in Desktop button
-
Save the repository clone in the minecraft/resourcepacks folder
-
Repeat steps 4 and 5 for each resource pack
-
To update the resource pack, use the desktop client to ‘Pull’ in any changes.
Command-Shift-Pon a MacControl-Shift-Pon Windows